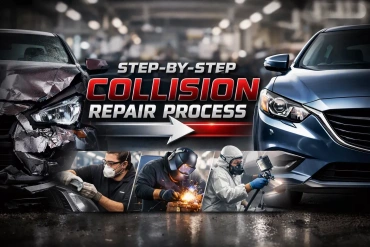
Collision repair follows a defined sequence: a written estimate and inspection, insurance approval, disassembly to uncover hidden damage, structural and frame repair, body and panel work, refinishing in a paint booth, reassembly with safety-system calibration, a quality-control check, and finally detailing and delivery. Each stage builds on the last, and skipping or rushing any step can leave a vehicle that looks finished but remains unsafe. Knowing what happens at each point helps you understand the timeline and ask the right questions along the way.
This article is part of our Collision Repair Basics guide.
Estimate and inspection
The process begins with a written estimate based on a visual inspection of the damage. A technician documents visible dents, broken panels, and scuffs, photographs the vehicle, and produces a line-by-line repair plan listing the parts and labor required. This first estimate is a starting point, not a final figure, because some damage cannot be seen until the vehicle is taken apart. To understand how this stage fits into the overall timeline, see how long collision repair takes.
Insurance approval
Once the estimate is written, it goes to your insurance company for approval before most repair work begins. The shop submits the estimate and supporting photos, and the insurer reviews the scope and authorizes payment for the agreed repairs. At First Class Collision, we work directly with insurers on your behalf, which keeps the paperwork moving and reduces the back-and-forth you have to manage yourself. If we find hidden damage later, we submit a supplement to update the approved amount.
Disassembly and teardown
Next, technicians disassemble the damaged area to expose what the first inspection couldn’t reach. Removing bumpers, panels, and trim almost always reveals additional damage, such as bent reinforcement bars, cracked brackets, or damage to components behind the vehicle’s outer skin. This teardown is when the true scope of the repair becomes clear, which is why an initial estimate often changes once the work is underway.
- We remove outer panels and trim for full access.
- We document hidden structural and mechanical damage.
- We file a supplement with the insurer for any new findings.
Structural and frame repair
If the impact affected the vehicle’s structure, frame and unibody repair comes before any cosmetic work. Technicians use measuring systems to compare the frame against factory specifications and pull or realign it back to the correct dimensions. Restoring the structure matters because the frame controls how the vehicle handles, how the panels line up, and how it protects occupants in a future crash. Learn more about our frame repair service.
Body and panel work
With the structure square, the focus shifts to repairing or replacing the body panels. Technicians straighten and smooth repairable panels, while replacing panels too damaged to restore with new parts. Technicians then fit each panel so the gaps and contours match the rest of the vehicle, preparing the surface for a clean, even finish.
Refinishing and paint
Refinishing restores the factory appearance through priming, color matching, and painting in a controlled booth. The color is matched to your vehicle’s paint code and blended into adjacent panels so the repair is invisible, then sprayed and cured in a clean, temperature-controlled environment that keeps dust out and helps the finish bond properly. Curing lets each coat harden fully before the next stage, giving the refinish durability and depth.
Reassembly and safety-system calibration
After painting, we reassemble the vehicle and recalibrate its safety and driver-assistance systems. We reinstall trim, lighting, sensors, and other components, and test and reset any system disturbed during the repair. Modern vehicles rely on cameras and sensors for features like automatic braking and lane assistance, and these must be calibrated to factory specifications so they perform correctly after the repair.
Quality control, detailing, and delivery
The final stage is a thorough quality-control inspection followed by detailing and delivery. A technician reviews the finished work against the repair plan, checking panel alignment, paint consistency, and the operation of lights and systems before signing off. The vehicle is then cleaned inside and out and returned to you in ready-to-drive condition. To see what a properly finished repair should look like, review the signs of quality collision repair and our full collision repair service.
Frequently asked questions
How long does the collision repair process take?
The timeline depends on the damage severity, parts availability, and insurance approval. Minor cosmetic repairs may take a few days, while jobs involving frame work and parts ordering can take longer. For a detailed breakdown, see our guide on how long collision repair takes.
Why does the estimate change after repairs begin?
The first estimate is based only on visible damage. Once the vehicle is disassembled, technicians often find hidden damage behind the panels, and we submit a supplement to the insurer to cover those additional repairs. This is a normal and expected part of the process.
Will the new paint match the rest of my car?
Yes. Refinishing uses your vehicle’s factory paint code, and the color is blended into surrounding panels so the repair is not noticeable. Painting and curing in a controlled booth helps the finish match the original in both color and durability.
Do you work with my insurance company?
Yes. First Class Collision works directly with insurers, submitting the estimate, photos, and any supplements needed for approval. Call us at +1-516-433-4448, and we can guide you through the claim from start to finish.
Damaged vehicle in Westbury or anywhere on Long Island? Contact First Class Collision for a free estimate and we will walk you through every step of the repair.