Car paint chip repair is fixing minor damage and scratches on the surface of a car’s paint. These damages can occur for various reasons, such as rocks, debris, or other external objects hitting the car while driving. It can also be caused by minor accidents, parking lot dings, or even exposure to harsh weather conditions. Regardless of the reason, these chips and scratches mark your car’s appearance and leave it vulnerable to further damage.
What Causes Paint Chips?
Paint chips are most often caused by flying road debris and exposure to environmental or harsh weather conditions. As you drive, tiny rocks, gravel, or sand can be flung up by your tires or other vehicles, striking your car’s surface at high speeds and creating small chips. Hailstorms can pelt your vehicle with ice, leaving deeper marks, while the sun’s UV rays may cause paint to fade or crack, making chips even more likely. Sometimes, all it takes is a careless moment in a parking lot or a stray shopping cart to create an unsightly chip.
Even cars with the highest quality paint jobs aren’t immune; over time, protective coatings wear thin and leave vehicles more susceptible to damage. As a result, older cars or those that frequently travel on rough terrain tend to have more chips and scratches. And let’s not forget: quick action is key. The smallest chip can start a chain reaction, leading to rust, fading, and peeling if not addressed promptly.
Fortunately, technological advancements and automotive techniques have made repairing car paint chips easy and affordable. This section provides a comprehensive guide to understanding car paint chip repair.
A Seasoned Perspective:
Take it from anyone who’s spent years in the garage—a small bottle of matching touch-up paint is an essential item for every car owner. Addressing chips as soon as they appear isn’t just about vanity; it’s a smart move to prevent a simple fix from turning into a major headache down the road.
The Importance of Car Paint Chip Repair
Many overlook minor scratches and chips on their cars because they believe it doesn’t affect their overall performance or value. However, neglecting these damages can lead to more severe issues in the long run. A minor chip or scratch may seem insignificant, but it exposes your car’s metal frame to external elements like moisture and air that can cause rusting over time.
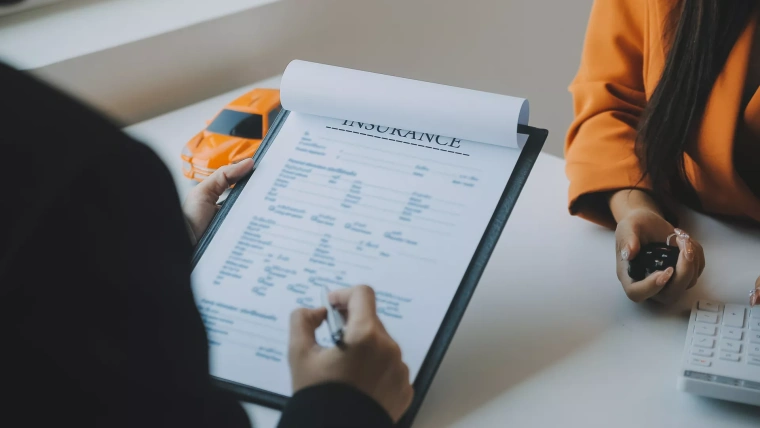
Furthermore, leaving these damages untreated may result in a more costly repair job when you resell your vehicle. Potential buyers will likely devalue a car with visible chips and scratches since it gives off an impression of poor maintenance.
The Process of Car Paint Chip Repair
Car paint chip repair involves several steps that need proper execution for effective results. The first step is identifying the location and extent of damage on your vehicle’s surface. This could range from tiny nicks to deep gouges that have removed multiple layers of paint.
Next comes preparing the area for repair, which includes cleaning any debris or foreign particles from the damaged spot. To do this, thoroughly wash the area with a mild car soap and water, then dry it with a clean microfiber towel. For stubborn grime, add a few drops of gentle dish detergent, like Dawn, to warm water and use a microfiber towel to gently scrub the chip and its surroundings. Rinse thoroughly and dry again to ensure a spotless surface.
Afterward, specialized tools level out uneven surfaces before applying touch-up paint that matches your original paint color. To further prep the area, gently rub a small amount of automotive polishing compound over the chip with a microfiber towel—just a few swirls are enough to soften any rough edges without damaging the clearcoat. Finally, remove any lingering wax, grease, or road grime by lightly wiping the chip with a towel dampened (not soaked) in wax remover or denatured alcohol. There’s no need to scrub; a few swipes will do the trick.
With a clean, smooth, and degreased surface, your car is now ready for the next step in the repair process.
Degreasing the Paint Chip Area
Before you start painting, it’s crucial to clean the damaged area thoroughly to ensure the new paint adheres properly. Begin by using a wax remover or denatured alcohol—these products are specifically formulated to strip away any lingering wax, grease, or road grime that may be sitting on your car’s surface.
Dampen a clean, lint-free microfiber towel (don’t soak it) with your chosen cleaner. Gently wipe across the chip and surrounding area. There’s no need for elbow grease here; a few light passes are all it takes to remove unseen residues.
Taking this extra step sets the stage for a flawless repair, ensuring your touch-up will bond well and leaving you with a professional-looking result.
The final step is buffing and polishing the repaired area to blend it seamlessly with the rest of your car’s paint. The result is a smooth, flawless surface that looks as good as new.
Understanding car paint chip repair is crucial for maintaining your vehicle’s appearance and value. With proper knowledge and techniques, you can quickly fix these damages at home or seek professional help for more severe cases.
Protecting the Repaired Paint Chip Area
Once you’ve meticulously touched up your car’s paint and admired your handiwork, it’s important to take steps to preserve that flawless look. To safeguard the freshly repaired area and ensure lasting results, consider these easy finishing touches:
- Apply a Protective Wax: Lightly rub a high-quality car wax over the repaired spot using a microfiber towel or soft applicator. This adds a protective barrier that helps shield the paint from environmental hazards and everyday wear.
- Consider a Ceramic Coating: If you want to go the extra mile, applying a ceramic coating offers enhanced durability against the elements, giving your paint job even longer-lasting protection and a brilliant shine.
- Buff and Polish for a Seamless Finish: After waxing, use a clean microfiber towel to gently buff the area, removing excess product and blending the repaired section with the surrounding paint for a truly seamless appearance.
A quick tip—avoid performing these finishing steps in direct sunlight or on chilly days (below 65°F), as temperature extremes can affect how the wax or coating sets. With these simple precautions, your car’s paint will remain glossy and well-protected, ready to turn heads wherever you go.
What Household Items Can Help With Car Paint Chip Repair?
You might be surprised to find that your kitchen and cleaning cupboard already hold a few handy helpers for paint chip repair. While professional detailing products can certainly make the job smoother, some common household items will do in a pinch:
- Dishwashing Liquid: For washing away dirt, grime, and greasy spots, a mild dish soap like Dawn works wonders. Just be sure to rinse thoroughly before proceeding.
- Microfiber Towels: These ultra-soft towels are perfect for drying and buffing your car’s surface, ensuring you don’t scratch it further during the process.
- Denatured Alcohol or Wax Remover: If you have rubbing alcohol or even vinegar at home, these can help strip away wax and oils from the chip area, allowing new paint to adhere better.
- Fine-Tipped Brushes: Those slender artist’s paintbrushes lurking in your craft drawer are ideal for applying touch-up paint with precision.
- Polishing Compound: You may already own a polishing or rubbing compound in your garage—this helps smooth and blend the repair with the rest of your paintwork.
- Car Wax: A finishing touch with a wax you already use can seal in your hard work and protect against future chips.
Of course, while these household items make for great stand-ins, pairing them with automotive touch-up paint and primer will help you achieve the best, longest-lasting results. With these basics on hand, you’re ready to tackle those pesky chips head-on!
Causes of Car Paint Chips
Several factors can contribute to the formation of paint chips on your car. Understanding these causes is crucial in helping you prevent and address this common issue. This section will discuss the main reasons why vehicle paint chips occur.
- Road Debris:
One of the most common causes of car paint chips is road debris, such as rocks, gravel, and sand. As you drive, these tiny particles can be kicked up by other vehicles or your tires and hit your car’s exterior surface at high speeds, causing tiny dents and scratches in the paint. Over time, repeated exposure to road debris can result in a buildup of paint chips on your car’s body. - Weather Conditions:
Extreme weather conditions can also contribute to the formation of paint chips on your car. Hailstorms, for example, can pelt your vehicle with large chunks of ice, leaving deep dents and scratches on its surface. Similarly, exposure to harsh UV rays from the sun can cause the top layer of paint to fade or crack over time, making it more susceptible to chipping. - Age and Wear:
As cars age, their protective coatings wear off due to regular use and exposure to various elements. This makes them more prone to damage from objects that come into contact with their exterior surfaces. Additionally, older cars are more likely to have existing minor imperfections in their paintwork that can worsen over time and develop into larger chips if left unaddressed. - Paint Quality:
The quality of your car’s original factory paint job also significantly affects its susceptibility to chip damage. Lower-quality paints tend to be less durable and may not provide adequate protection against external elements compared to higher-quality ones. - Driving Habits:
Believe it or not, your driving habits could also affect how often you experience paint chip issues with your vehicle. For instance, if you frequently drive on unpaved roads or rough terrain, your car will likely be exposed to road debris and experience chipping. Similarly, driving at high speeds can increase the impact force from objects hitting your car’s surface, causing more severe damage.
Understanding the causes of car paint chips is key to preventing them from occurring in the first place. By being mindful of these factors and taking proper precautions, you can minimize the risk of paint chip damage and keep your car looking pristine for longer. In the next section, we will delve into different methods for repairing paint chips and restoring your vehicle’s appearance.
Taking this extra step sets the stage for a flawless repair, ensuring your touch-up will bond well and leaving you with a professional-looking result.
Prevention Tips for Paint Chipping
While it’s impossible to shield your car from every hazard, a few proactive steps can make a big difference:
- Apply Protective Films or Vinyl Wraps: If you frequently drive on highways or find your car regularly peppered by stones and debris, consider installing a paint protection film or a vinyl wrap. These barriers act as a sacrificial layer, taking the brunt of the impact and preserving your car’s original paint underneath.
- Use Ceramic Coatings: Areas most prone to chip damage—like the hood, front bumper, and side mirrors—can benefit from an added layer of defense. Applying a ceramic coating increases paint durability, helping resist chips, scratches, and environmental wear.
- Mind Your Driving Habits: Staying clear of gravel roads when possible and maintaining safe following distances can reduce the likelihood of debris striking your vehicle.
- Regular Maintenance: Promptly washing off road salt, bird droppings, and other contaminants can prevent paint from deteriorating and becoming more vulnerable to chips.
By combining awareness of common causes with these preventive measures, you’ll not only reduce the risk of paint chips but also extend the life and beauty of your car’s finish.
Benefits of Repairing Paint Chips
Paint chips on cars are common and can occur for various reasons, such as rocks or debris hitting the car while driving, scratches from keys or other objects, ornatural wear and tear over time. While some may ignore these paint chips, it is essential to understand that repairing them can benefit your vehicle’s appearance and value.
- Improved Aesthetics
One of the main benefits of repairing paint chips is the improved aesthetics of your car. These minor blemishes may seem insignificant at first, but if left untreated, they can accumulate and significantly detract from your vehicle’s overall appearance. By repairing paint chips, you can restore your car’s surface to a smooth, seamless appearance, giving it a fresh, well-maintained look. - Protection Against Rust
When a chip in your car’s paintwork exposes the metal underneath to moisture and air, it can cause rusting. Rust looks unsightly and weakens the structural integrity of your car’s body panels. By promptly repairing paint chips, you can prevent further damage and protect your vehicle from potential corrosion. - Cost-Effective Solution
Many people tend to put off fixing minor damages like paint chips because they think it will be too expensive or time-consuming. However, fixing paint chips is relatively inexpensive and quick compared to more extensive repairs that may be needed if left untreated. Moreover, if you plan to sell or trade your car in the future, having a well-maintained exterior with minimal imperfections will help retain its value. - Prevents Spread of Damage
Paint chips may start small but quickly spread into larger areas if ignored for too long. Over time, these minor blemishes can become larger cracks that require more extensive repairs or even complete repainting of affected areas. By repairing paint chips as soon as they occur, you are preventing the damage from spreading and potentially saving yourself from more costly repairs in the future. - Easy DIY Option
With many car paint chip repair kits, fixing minor damages can be a simple and affordable DIY project. These kits come with step-by-step instructions and all the necessary tools to make the process hassle-free. However, it is best to seek professional help to ensure a high-quality repair job for larger or more complex damages.
Repairing paint chips enhances the appearance of your vehicle, protects it against further damage, and preserves its value. With various benefits such as improved aesthetics, rust prevention, cost-effectiveness, prevention of damage spread, and easy DIY options, it is clear that addressing these small imperfections is well worth the effort.
Different Methods of Car Paint Chip Repair
There are several car paint chip repair methods, each with advantages and disadvantages. This section will discuss the three most commonly used techniques: touch-up paint, spot blending, and professional repainting.
1. Touch-Up Paint:
Touch-up paint is a popular method for minor car paint chip repairs. It involves using a small brush or pen to apply a matching touch-up paint color to the chipped area. This method is relatively easy and inexpensive, making it a preferred choice for DIY enthusiasts.
To use this method effectively, you must ensure that the touch-up paint perfectly matches your car’s original color. Otherwise, you may have noticeable patches on your vehicle’s surface. It is also essential to clean and prep the chipped area before applying the touch-up paint for optimal results. Don’t skip the preparation—paint simply won’t stick to wax, dust, or dirt. Carefully clean the chip first, and make sure the surface is totally dry before you start. Rushing through the process or applying too much paint can lead to unsightly, uneven repairs that don’t last as long.
While touch-up paint may be suitable for small chips or scratches, it may be less effective in covering more significant or profound damage. Additionally, over time, the touched-up area may become more noticeable due to differences in texture and shine compared to the rest of the car’s surface.
- Spot Blending:
Spot blending is another popular technique for repairing car paint chips. Instead of touching up only the chipped area, this method paints a more significant portion of the surrounding panel. This allows for better color and texture blending between the repaired spot and its surroundings.
Spot blending requires special equipment, such as an airbrush or sprayer, and proper training and skills. This makes it more challenging than touch-up paint, but it can provide better results if done correctly.
Step-by-Step Touch-Up Paint Process
- Assess the Damage:
Touch-up paint works best for small chips—generally, if the chip is about one-fourth the size of a dime (roughly 1/8 to 1/4 inch), it’s a good candidate for this approach. If you spot rust or a dent, more advanced repairs may be needed. - Gather Supplies:
Most car paint chip repair kits include the essentials: touch-up paint (matched to your car’s color code), primer, fine artist’s brushes or applicators, microfiber towels, and possibly polishing compound. You’ll also want soap (like Dawn dishwashing detergent), wax remover or denatured alcohol, and car wax. For added protection, a ceramic paint coating is optional. - Clean and Prep the Area:
Start by thoroughly washing the chipped area and surrounding paintwork with soap and water, then dry with a microfiber towel. For best results, mix a few drops of dishwashing detergent with warm water to remove any road grime or residue.
Next, use a polishing compound to gently soften any rough edges around the chip, followed by a quick wipe with wax remover or denatured alcohol to eliminate any grease or lingering wax. - Prime the Chip:
If your kit includes primer, dab a small amount into the chip using a fine brush. Let it dry for at least 30 minutes before proceeding. - Apply Touch-Up Paint:
Test your paint on a piece of white paper to double-check the color match and get a feel for the brush. Carefully apply a thin layer of touch-up paint over the primed chip. Allow it to dry, then add a second coat if needed. For larger chips, patience and thin layers yield the best results. - Finishing Touches:
Once the paint is fully cured (often after a day or two), gently buff the area with polishing compound to blend the repair edges into the surrounding paint. Finish with a coat of quality car wax to protect the new paint and enhance shine. For extra durability, consider applying a ceramic coating.
While touch-up paint may be suitable for small chips or scratches, it may be less effective in covering more significant or profound damage. Additionally, over time, the touched-up area may become more noticeable due to differences in texture and shine compared to the rest of the car’s surface.
With many car paint chip repair kits, fixing minor damages can be a simple and affordable DIY project. These kits come with step-by-step instructions and all the necessary tools to make the process hassle-free.
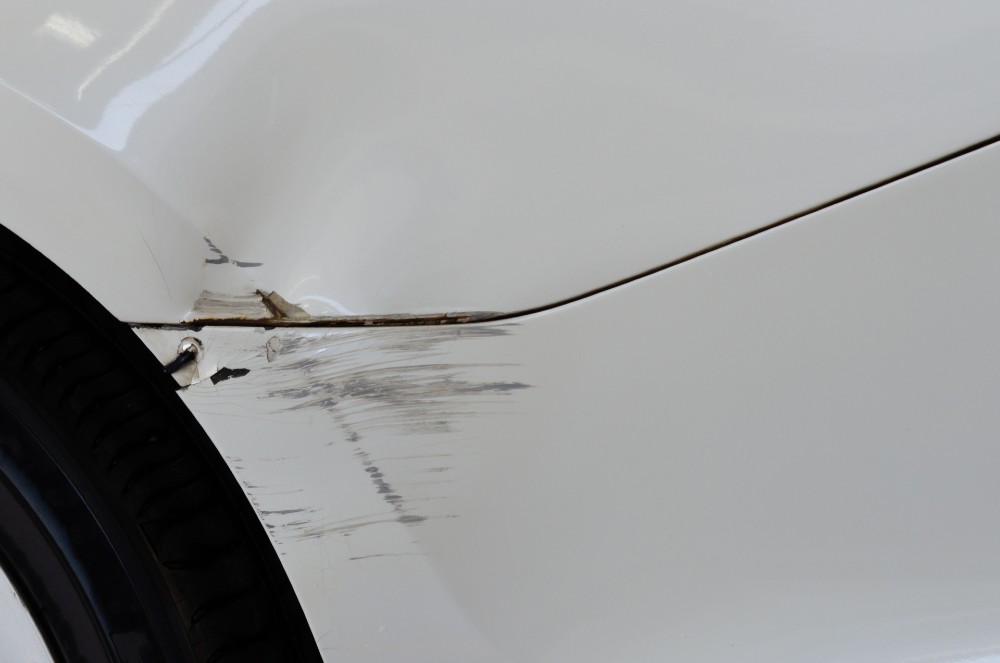
However, it is best to seek professional help to ensure a high-quality repair job for larger or more complex damage. If the paint chip on your vehicle has already started to rust or is accompanied by a dent, the repair process can become much more challenging. Chips with visible rust or raised paint edges often require additional steps beyond simple touch-up kits, such as removing the rust, smoothing the area, and potentially filling dents before repainting. In these cases, addressing the issue promptly with an expert can prevent damage from worsening and help maintain your car’s appearance and structural integrity.
2. Spot Blending:
Spot blending is another popular technique for repairing car paint chips. Instead of touching up only the chipped area, this method paints a more significant portion of the surrounding panel. This allows for better color and texture blending between the repaired spot and its surroundings.
Spot blending requires special equipment, such as an airbrush or sprayer, and proper training and skills. This makes it more challenging than touch-up paint, but it can provide better results if done correctly.
However, like touch-up painting, spot blending has limitations when it comes to repairing large or deep chips that extend beyond the boundaries of one panel on your vehicle’s surface.
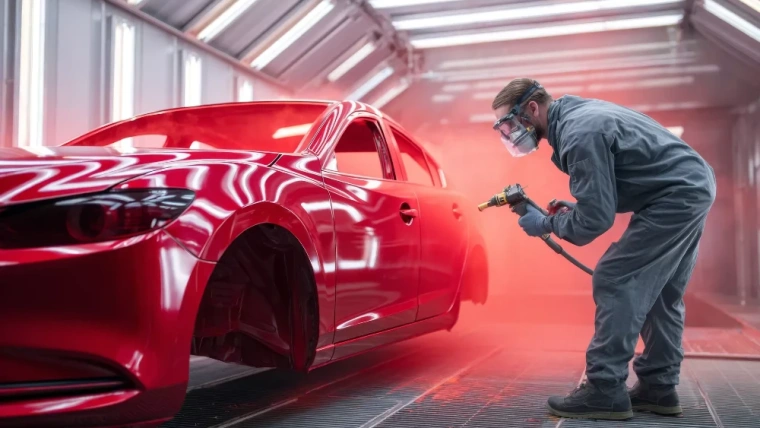
3. Professional Repainting:
Professional repainting is the recommended repair method for significant damage like extensive chipping or peeling areas on your car’s surface. This involves removing the damaged paint layer, sanding and priming the affected area, and applying multiple layers of fresh paint to match your car’s original color.
The process begins with careful preparation: the damaged paint is sanded down, ensuring a smooth, even surface. Next, a primer is applied—often with a fine artist’s brush for precision—paying special attention to cover just the chipped area and its immediate edges. The primer should be allowed to dry thoroughly, typically for at least half an hour, to ensure proper adhesion of the paint layers that follow.
Once primed, the technician will apply several coats of matching automotive paint, blending each layer seamlessly into the surrounding panel. This meticulous approach not only restores the car’s appearance but also provides lasting protection against future damage. The end result is a finish that’s virtually indistinguishable from the original, making professional repainting the go-to choice for those seeking a flawless repair.
Professional repainting requires specialized equipment and expertise to achieve a flawless finish. While this method may be more expensive than touch-up painting or spot blending, it can provide long-lasting results that are virtually undetectable.
There are various methods for repairing car paint chips, each with strengths and limitations. Depending on the size and severity of the chip and your budget and skill level, you can choose a suitable method for restoring your vehicle’s appearance. However, seeking professional help for more extensive or significant damage is always advisable to ensure a high-quality repair.
Professional repainting requires specialized equipment and expertise to achieve a flawless finish. While this method may be more expensive than touch-up painting or spot blending, it can provide long-lasting results that are virtually undetectable.
Based on your budget and skill level, here are various methods for repairing car paint chips, each with strengths and limitations. Depending on the size and severity of the chip, your budget, and your skill level, you can choose a suitable method to restore your vehicle’s appearance. However, seeking professional help for more extensive or significant damage is always advisable to ensure a high-quality repair.
Common Mistakes to Avoid When Repairing Chipped Car Paint
Achieving a seamless car paint chip repair isn’t just about the method you choose—it’s also about sidestepping some frequent pitfalls. Here are the most common mistakes to steer clear of:
- Neglecting Proper Surface Prep: Failing to thoroughly clean the chipped area is one of the biggest missteps. Any lingering wax, dust, or oil can prevent the paint from adhering properly, leaving you with uneven or peeling results.
- Skipping Drying Time: Patience pays off. Rushing through the process by not allowing the primer or paint to fully dry between coats can lead to bubbling, poor blending, or a rough finish.
- Overapplying Paint: Applying too much paint (or globbing it on in one go) tends to result in messy, raised patches that are impossible to hide. Multiple thin layers, with proper drying in between, always look better.
- Forgetting to Blend or Buff: If you simply dab paint onto the chip and call it done, you may wind up with a repair that stands out, rather than blends in. Carefully feathering the edges and lightly buffing the area once dry will help create a more subtle fix.
- Ignoring Manufacturer Instructions: Each product—whether genuine OEM touch-up paint, Dupli-Color, or another reputable brand—has specific guidelines for best results. Not following these can compromise your repair.
By avoiding these common errors, you’ll give your repair the best shot at being both durable and discreet. Remember, a little attention to detail goes a long way when restoring your car’s appearance.